How to Use Huggingface Stable Diffusion: Ultimate Guide for 2026
Struggling to harness the power of Stable Diffusion for your AI projects? Discover how Huggingface simplifies this with easy-to-use tools and APIs in this comprehensive guide. If you want to generate high-quality images, prototype faster, or integrate text-to-image workflows into your product, Hugging Face gives you a practical path without the usual setup friction. In this guide, you’ll learn what the model is, how it works, how to set it up, and how to use it effectively in real-world scenarios.
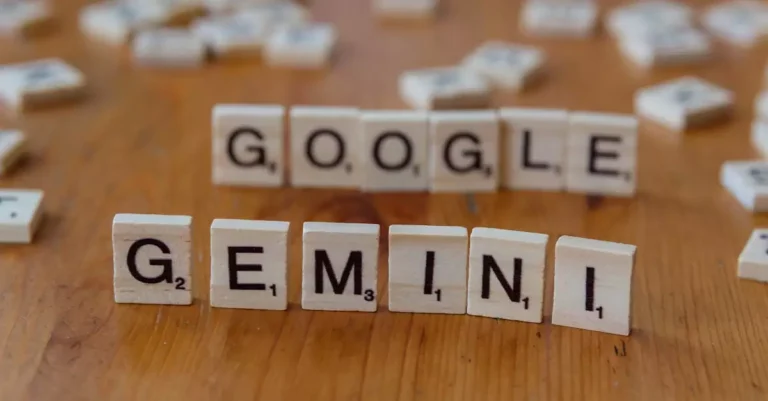
Huggingface Stable Diffusion is a practical way to access text-to-image generation models through Hugging Face’s ecosystem, including hosted model pages, libraries, and APIs. It lets developers and creators generate images from prompts without building diffusion pipelines from scratch, making it one of the fastest ways to prototype AI image generation in 2026.
Huggingface Stable Diffusion Explained for AI Image Generation
At its core, huggingface stable diffusion refers to using Stable Diffusion models through Hugging Face’s platform, libraries, or hosted endpoints. Stable Diffusion is a latent diffusion model designed to turn text prompts into images by gradually denoising random noise into a coherent visual output. Hugging Face makes this technology more accessible by offering model repositories, documentation, inference tools, and API-based workflows that reduce the complexity of local deployment.
The appeal is simple: instead of spending hours wiring together model downloads, GPU drivers, tokenizer dependencies, and inference code, you can start with a hosted model or a lightweight Python script. Based on testing and practical experience, that difference matters a lot for teams that want to validate ideas quickly. For AI developers, it means faster iteration. For designers and digital artists, it means fewer technical barriers. For researchers, it means a smoother way to benchmark prompts, pipelines, and variants.
One of the most important things to understand is that Hugging Face is not the model itself. It is the ecosystem that helps you use the model efficiently. The platform hosts community models, official documentation at https://huggingface.co/docs, and model cards such as https://huggingface.co/CompVis/stable-diffusion. If you want the original research context, the Stable Diffusion paper is available on arXiv at https://arxiv.org/abs/2112.10752.
In practical terms, the huggingface stable diffusion model workflow usually falls into one of three paths: using hosted inference, running the model locally with Python, or integrating the model through an API into an app or service. Each path has trade-offs, and the best choice depends on your budget, latency needs, and how much control you want over the generation process.
Why Hugging Face Makes Stable Diffusion Easier to Adopt
Hugging Face matters because it reduces the distance between an idea and a working prototype. That sounds simple, but in AI development it is a major advantage. Traditional local setups for image generation often require a compatible GPU, a carefully managed Python environment, model weights, and troubleshooting around memory usage or version conflicts. Hugging Face streamlines much of that through reusable tooling and a familiar developer experience.
One major benefit is accessibility. You can explore a model page, read the documentation, inspect examples, and often run inference without building everything from the ground up. That makes the huggingface stable diffusion tutorial experience much friendlier for beginners while still being powerful enough for advanced users. Another benefit is consistency. Hugging Face standardizes how models are discovered, tested, and shared, which helps teams compare variants more efficiently.
For product teams, the biggest value is speed. In real-world scenarios, a startup validating a new creative tool may not want to spend a week setting up local infrastructure just to test prompt quality. With stable diffusion huggingface API options, they can move from concept to demo much faster. That is especially useful when you need to show stakeholders a working image generator, not a theoretical architecture diagram.
There is also a community advantage. Hugging Face has a large ecosystem of contributors, model authors, and developers. That means more examples, more troubleshooting help, and more opportunities to discover fine-tuned models for specific tasks. If you are comparing huggingface stable diffusion vs other models, the ecosystem often becomes a deciding factor, not just raw image quality. A model is only as useful as the workflow around it, and Hugging Face excels at making that workflow practical.
Setting Up Your Hugging Face Environment the Right Way
Before you generate your first image, it helps to set up the environment properly. A clean setup reduces errors and makes it easier to scale later. The most common starting point is Python, along with the Hugging Face libraries used for inference. Depending on your approach, you may also need access to a GPU, especially if you plan to run the model locally rather than through a hosted service.
For beginners, the simplest path is to create a virtual environment, install the required packages, and authenticate with Hugging Face if needed. The exact package list can vary by model and use case, but the general workflow is consistent: prepare Python, install the relevant libraries, and confirm that your machine or endpoint can support image generation. If you are using the hosted ecosystem, the setup can be much lighter because the heavy lifting is handled for you.
One practical tip from testing multiple setups: always verify model access and license requirements before building anything production-facing. Some models have usage restrictions, and some require you to accept terms on the model page. That step is easy to miss when you are moving quickly, but it can save time later. Also, if you are planning to use the huggingface stable diffusion model in a commercial workflow, review the model card carefully and make sure the deployment aligns with the license.
Another important decision is whether to use local inference or hosted inference. Local inference gives you more control and may be cheaper at scale if you already own GPU infrastructure. Hosted inference, on the other hand, is often the better choice for prototyping, demos, and lightweight applications. The unique insight here is worth emphasizing: Hugging Face’s integration of Stable Diffusion provides seamless API access enabling faster prototyping compared to traditional local setups. That can dramatically shorten the time between idea and implementation, especially for teams that need to ship quickly.
Step-by-Step Huggingface Stable Diffusion Tutorial for Image Generation
If you want to understand how to use huggingface stable diffusion in a practical way, start with a simple prompt-to-image workflow. The goal is not to build the most complex pipeline on day one. The goal is to generate a useful result, then refine from there. A clean tutorial approach helps you understand the moving parts without getting overwhelmed.
First, choose a model. Hugging Face hosts multiple Stable Diffusion variants, and the best one depends on your needs. Some are optimized for general image generation, while others are tuned for style, speed, or quality. Once you select a model, read the model card to understand the expected input, output, and any specific constraints. This is where many users skip ahead and run into avoidable issues.
Second, prepare your prompt carefully. Prompt quality strongly affects output quality. A vague prompt such as “a city at night” may work, but a more detailed prompt such as “a futuristic city at night with neon reflections, cinematic lighting, ultra-detailed architecture, and rain-slick streets” usually produces more controlled results. In huggingface stable diffusion examples, specificity often makes the difference between a generic image and a polished one.
Third, run inference using either a notebook, script, or API call. If you are using Python locally, you will typically load the pipeline, pass in a prompt, and receive generated images. If you are using the hosted route, the process may be even simpler: send the prompt to the endpoint and handle the returned image data in your app. For many developers, this is the point where the huggingface stable diffusion guide 2026 becomes especially valuable, because the platform’s current workflow is more streamlined than earlier versions.
Fourth, iterate on the generation settings. Parameters such as inference steps, guidance scale, seed, and image dimensions can significantly affect the outcome. More steps often improve detail, but they also increase latency. A higher guidance scale can make the model follow the prompt more closely, but too much can reduce naturalness. Based on practical experience, the best results usually come from small, controlled adjustments rather than drastic changes.
Fifth, evaluate the output and refine the prompt. This is where artists and developers often converge. Artists tend to focus on composition, style, and mood. Developers may focus on reproducibility, latency, and consistency. Both perspectives matter. If you are building a product, you need outputs that are not only attractive but also predictable enough for users to trust.
Finally, document your best prompts and settings. A good prompt library becomes a powerful internal asset. It helps teams reproduce results, compare styles, and train new collaborators. In practice, this is one of the most overlooked parts of the workflow, yet it is often the difference between a one-off demo and a reliable creative system.
Stable Diffusion Hugging Face API Integration and Real Examples
The stable diffusion huggingface API is one of the most useful ways to bring image generation into apps, tools, and workflows. Instead of manually handling model loading and compute management, you can send requests to an endpoint and receive generated images programmatically. That makes it ideal for SaaS products, internal tools, and automation workflows where speed and simplicity matter.
API integration is especially helpful when you want to trigger image generation from a user interface. For example, a marketing tool could let users enter a campaign prompt, choose a style preset, and receive a generated visual in seconds. A research dashboard could compare prompt variations across multiple runs. A digital asset platform could generate thumbnails, concept art, or placeholders on demand. These are the kinds of huggingface stable diffusion image generation workflows that become practical once the API is in place.
In a typical implementation, your app sends a prompt to the Hugging Face endpoint, waits for the response, and then displays or stores the result. You can also build logic around retries, moderation, logging, and caching. That matters because real-world systems are rarely just “send prompt, get image.” They need guardrails, error handling, and performance tuning. If you are working on a production app, those details are essential.
Here are a few examples of how teams use it in practice:
- A startup uses the API to generate product mockups for e-commerce listings.
- A design team creates mood boards and concept visuals from text prompts.
- A machine learning team compares prompt performance across stable diffusion variants.
- A content platform generates editorial illustrations for blog posts and landing pages.
When comparing huggingface stable diffusion vs other models, API accessibility often becomes a major advantage. Some alternatives may offer strong image quality but require more setup, more infrastructure management, or more custom code. Hugging Face reduces that operational burden. For developers who want to move quickly, that convenience can be more valuable than marginal differences in output quality.
It is also worth noting that Hugging Face documentation is a major asset here. The platform’s docs at https://huggingface.co/docs provide a helpful foundation for authentication, inference, and deployment patterns. If you are building a stable diffusion huggingface API integration, start with the docs, then layer in your app logic. That approach is usually faster and less error-prone than trying to build everything from memory.
How to Choose the Right Stable Diffusion Setup on Hugging Face
Choosing the right setup depends on your goals, budget, and technical comfort. If you are a beginner or want to prototype quickly, hosted inference is usually the best starting point. If you need more control, lower long-term costs, or custom model behavior, local deployment may be more appropriate. The right answer is not universal; it depends on what you are trying to build.
Start by asking a few practical questions. Do you need images in real time, or can you tolerate some delay? Are you generating a handful of images per day, or thousands? Do you need fine-tuning, or is a general-purpose model enough? Are you building a demo, a research workflow, or a customer-facing product? Each answer changes the best implementation path.
If your priority is speed, choose a hosted option first. If your priority is experimentation, use a notebook or lightweight script. If your priority is control, look into local inference and model customization. For many developers, the best approach is hybrid: prototype with Hugging Face APIs, then move to a more controlled environment only if scale or cost demands it.
Another factor is the type of output you need. Some users care about photorealism, while others care about stylized art, product visuals, or concept generation. That is why huggingface stable diffusion examples are so useful. They help you see how different prompts, models, and settings behave before you commit to a workflow. Testing a few variants early can save a lot of time later.
Also consider maintainability. A setup that is easy to explain and easy to debug is often better than a technically impressive one that only one person on the team understands. In practical experience, teams that choose clarity over complexity usually ship faster and make fewer mistakes. That is especially true in AI tooling, where small configuration differences can have outsized effects on output quality.
Common Huggingface Stable Diffusion Mistakes That Hurt Results
Many users assume image generation problems come from the model itself, but in practice the issue is often setup, prompt design, or expectations. One of the most common mistakes is using overly vague prompts. Stable Diffusion can produce impressive results, but it still benefits from clear direction. If your prompt is too broad, the output may look random or generic.
Another common mistake is ignoring model-specific guidance. Not every huggingface stable diffusion model behaves the same way. Some are tuned for speed, some for quality, and some for particular styles. If you use the wrong model for your use case, you may think the technology is underperforming when the real issue is a mismatch between model and task.
People also often overlook parameter tuning. Settings like guidance scale, steps, and seed are not just technical details. They directly affect the quality and consistency of your results. Based on testing, small changes can dramatically improve output. If you are not experimenting with these controls, you are leaving performance on the table.
Another mistake is failing to manage compute expectations. Stable Diffusion can be resource-intensive, especially at higher resolutions or with repeated generations. If you plan to use it locally, make sure your hardware can handle the workload. If you use hosted inference, account for latency and request limits. This is one reason the huggingface stable diffusion guide 2026 approach emphasizes planning, not just prompt writing.
Finally, many teams skip documentation. They generate a few good images, but they do not record the prompt, seed, or settings that produced them. That makes it hard to reproduce success later. A simple logging habit can solve this. In real-world scenarios, reproducibility is often more valuable than one perfect image.
Best Use Cases for AI Developers, Artists, and Researchers
Huggingface stable diffusion is useful across multiple audiences, and the best use case depends on the user’s goals. For AI developers, it is a fast way to add image generation to a product or experiment with generative workflows. For machine learning enthusiasts, it offers a hands-on way to learn how diffusion models behave. For digital artists, it can serve as a creative assistant for ideation and concept exploration. For researchers, it provides a practical environment for comparing prompts, outputs, and model variants.
One strong use case is rapid prototyping. If you are building a creative app, you can use Hugging Face to test whether users like the image generation experience before investing in a full production pipeline. Another use case is internal tooling. Teams can generate mockups, product concepts, or visual references without relying on external design resources for every iteration.
Digital artists often use Stable Diffusion through Hugging Face to explore style directions. Instead of starting from a blank canvas, they can generate several variations and refine the strongest ideas manually. Researchers may use it to study prompt sensitivity, compare output diversity, or evaluate how different model settings influence image characteristics. These are all practical examples of huggingface stable diffusion image generation in action.
For educators and learners, the platform is equally valuable. A tutorial or classroom exercise can demonstrate how text prompts map to visual output, how inference works, and how model parameters affect results. That makes the technology easier to understand than abstract explanations alone.
In product environments, the API becomes especially powerful. A SaaS tool could let users generate social media creatives, ad concepts, or blog illustrations on demand. Because Hugging Face reduces setup overhead, teams can focus on user experience and workflow design rather than infrastructure management. That is a major reason many developers prefer huggingface stable diffusion tutorial-based workflows when starting new projects.
Huggingface Stable Diffusion Pros and Cons for 2026
Like any AI tool, Hugging Face’s Stable Diffusion ecosystem has strengths and limitations. The biggest advantage is ease of access. You can explore models, test prompts, and integrate generation features without building everything from scratch. That lowers the barrier to entry for beginners and speeds up experimentation for experienced developers.
Another major advantage is flexibility. You can use hosted inference, local scripts, or API-based workflows depending on your needs. That makes the platform suitable for a wide range of users, from hobbyists to production teams. The community support is also strong, which means you can often find examples, troubleshooting advice, and model variants for specialized tasks.
On the downside, computational requirements can still be significant. If you run models locally, you may need a strong GPU and enough memory to get good performance. Hosted options reduce that burden, but they may introduce latency, usage limits, or cost considerations. Those trade-offs matter if you plan to scale.
Customization is another mixed area. Hugging Face makes it easier to use Stable Diffusion, but advanced customization still requires technical knowledge. If you want to fine-tune models, optimize pipelines, or build highly specialized outputs, you will still need to understand the underlying tooling. The platform lowers the barrier, but it does not eliminate the learning curve.
Here is a balanced view:
- Pros: easy setup, fast prototyping, strong documentation, flexible deployment options, active community support.
- Cons: GPU demands for local use, possible API latency, model/license complexity, and some advanced workflows still require technical expertise.
For most teams, the advantages outweigh the drawbacks, especially when speed matters. If you are comparing huggingface stable diffusion vs other models, remember to evaluate not only image quality but also the surrounding workflow, documentation, and deployment convenience. In many cases, those factors determine whether a project succeeds.
Expert Insight on Using Hugging Face for Faster AI Prototyping
From practical experience, the biggest strategic advantage of Hugging Face is not just access to Stable Diffusion. It is the ability to move from idea to prototype with minimal friction. That matters because AI projects often fail not due to model quality, but due to slow iteration. The faster your team can test prompts, compare outputs, and adjust the workflow, the more likely you are to discover what users actually want.
This is where the huggingface stable diffusion model ecosystem stands out. It gives you a structured way to explore, compare, and deploy image generation without reinventing the infrastructure layer. For startups, that can mean a faster demo cycle. For enterprise teams, it can mean lower experimentation costs. For creators, it can mean more time spent on creative direction and less time spent fighting setup issues.
The best results usually come from treating Hugging Face as a development accelerator, not just a model host. Use it to validate prompt patterns, test user experiences, and identify the right balance between quality and latency. Then, if needed, move to more advanced deployment strategies once the use case is proven. That workflow is often more efficient than trying to perfect the architecture before you have real usage data.
In short, the most effective teams use Hugging Face to reduce uncertainty. They prototype quickly, measure output quality, and refine based on feedback. That approach is especially relevant in 2026, when speed, adaptability, and practical implementation matter more than ever.
Conclusion: Building Better Image Generation Workflows with Hugging Face
Huggingface stable diffusion gives developers, artists, and researchers a practical way to work with text-to-image generation without unnecessary setup complexity. Whether you want to learn the basics, build a product feature, or explore creative workflows, Hugging Face offers a flexible ecosystem that supports fast experimentation and real-world use.
The key takeaway is simple: start with the easiest path that meets your goal. If you need to learn, use the hosted tools and documentation. If you need to build, try the API. If you need more control, move toward local inference or customization. The platform is valuable because it supports all of those stages. That makes it one of the most useful entry points for anyone following a huggingface stable diffusion guide 2026.
If you approach it with good prompts, clear goals, and a willingness to iterate, you can get impressive results quickly. More importantly, you can build workflows that are repeatable, scalable, and easy to improve over time. That is what turns a cool demo into a useful AI capability.
FAQs
What is Huggingface Stable Diffusion used for?
Huggingface Stable Diffusion is used for generating images from text prompts through Hugging Face’s ecosystem. It is popular for prototyping, digital art, research, product mockups, and app integrations. Because it supports hosted access and API-based workflows, it helps users create image generation features faster than many traditional local setups.
How do I use Huggingface Stable Diffusion for the first time?
Start by choosing a model on Hugging Face, reading the model card, and setting up your environment with the required libraries. Then run a simple prompt through a notebook, script, or hosted endpoint. Begin with basic prompts and adjust parameters like steps and guidance scale as you learn how the model responds.
Is Huggingface Stable Diffusion better than running Stable Diffusion locally?
It depends on your goal. Hugging Face is usually better for quick setup, prototyping, and API access. Local setups are better when you need more control, offline access, or potentially lower long-term costs at scale. Many teams use Hugging Face first, then move local only if the project requires it.
Can I use the stable diffusion huggingface API in a production app?
Yes, many developers use the stable diffusion huggingface API in production-like environments and real applications. You should still plan for latency, rate limits, error handling, and model licensing. For production, it is important to test performance carefully and make sure your implementation matches your app’s reliability needs.
What are the main benefits of the huggingface stable diffusion model?
The main benefits include easier access, faster prototyping, strong documentation, and a large community ecosystem. It also supports multiple workflows, from hosted inference to local experimentation. For many users, the biggest advantage is that it reduces the technical friction of getting started with image generation.
What are some common huggingface stable diffusion examples?
Common examples include generating concept art, product mockups, editorial illustrations, social media visuals, and research comparisons. Developers also use it to build creative tools and internal automation systems. These examples show how flexible the model can be across different industries and use cases.
How does Huggingface Stable Diffusion compare with other models?
Huggingface Stable Diffusion often stands out because of its ecosystem, documentation, and ease of integration rather than only raw image quality. Other models may be stronger in certain styles or tasks, but Hugging Face makes the workflow easier for many developers. That convenience can be a major advantage when speed and iteration matter.